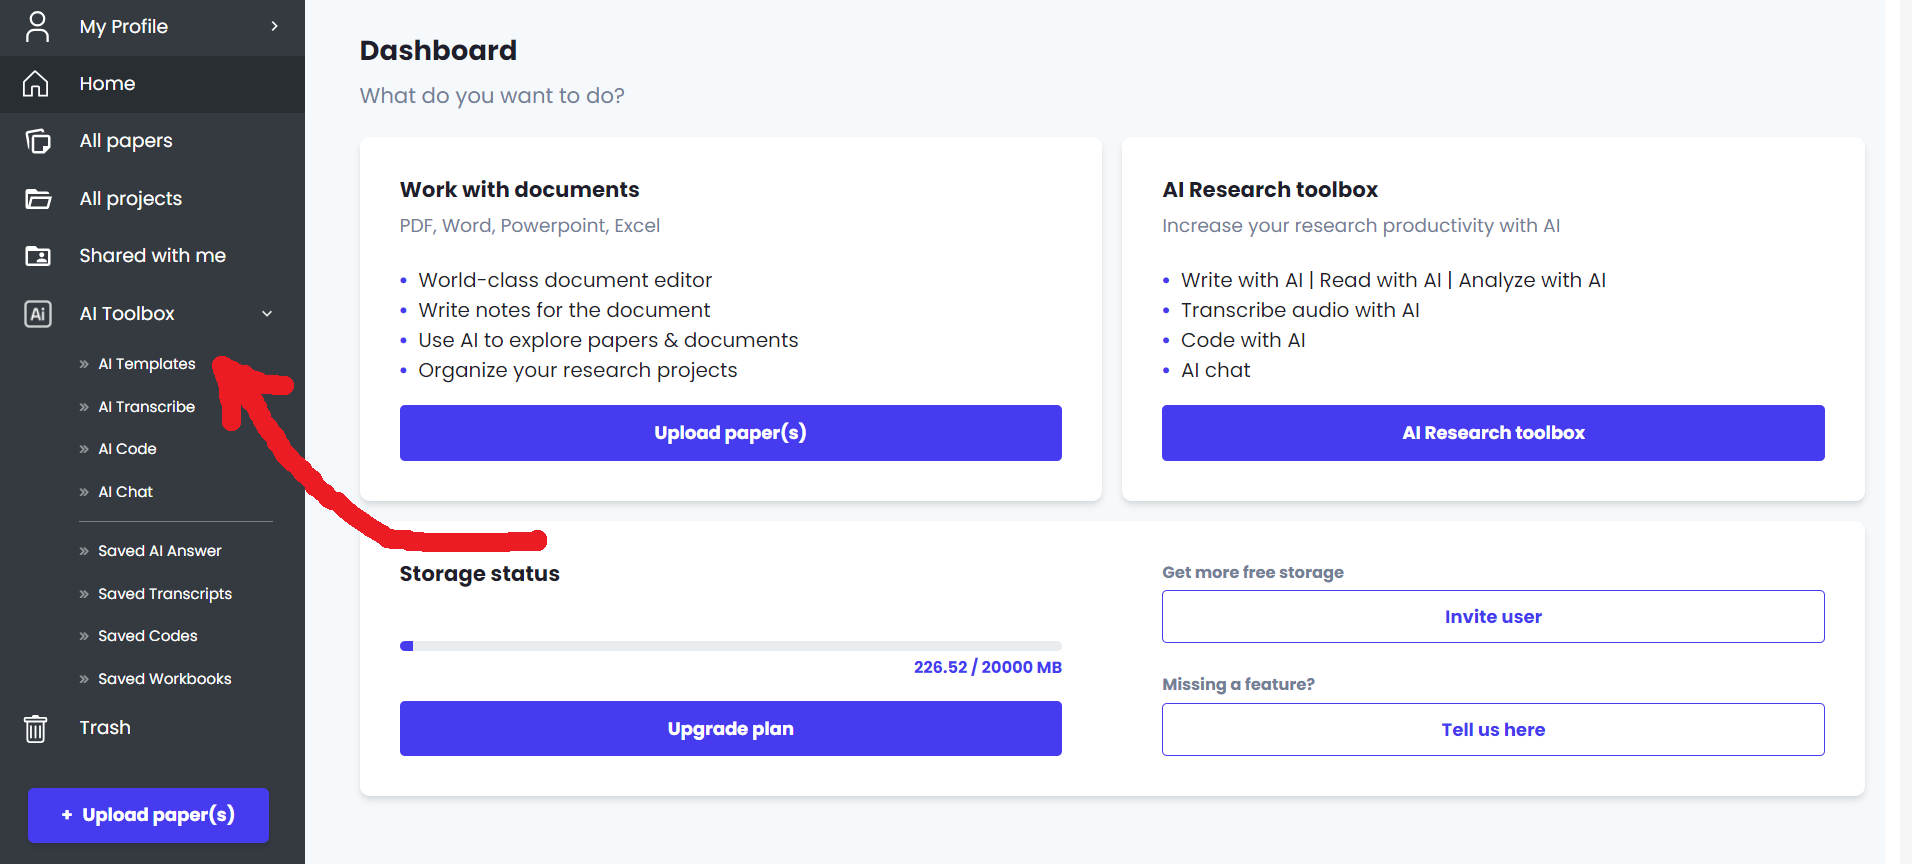
How to get started
Here are the most popular things to do on Avidnote. Start with these three.
To start writing with AI. As soon
1) In the left sidebar, click on AI Templates.
2) You can then select any of the templates to help you write. For example, if you are writing a Literature review, you can select the template called Write literature review.
In the left side, you will write your input. This is where you tell the AI what the literature review should be about. You can also copy and paste text from your paper if you want. In this example, I gave it a simple description. The more detailed you are, the better. If you are not happy with the output, try to change the input.
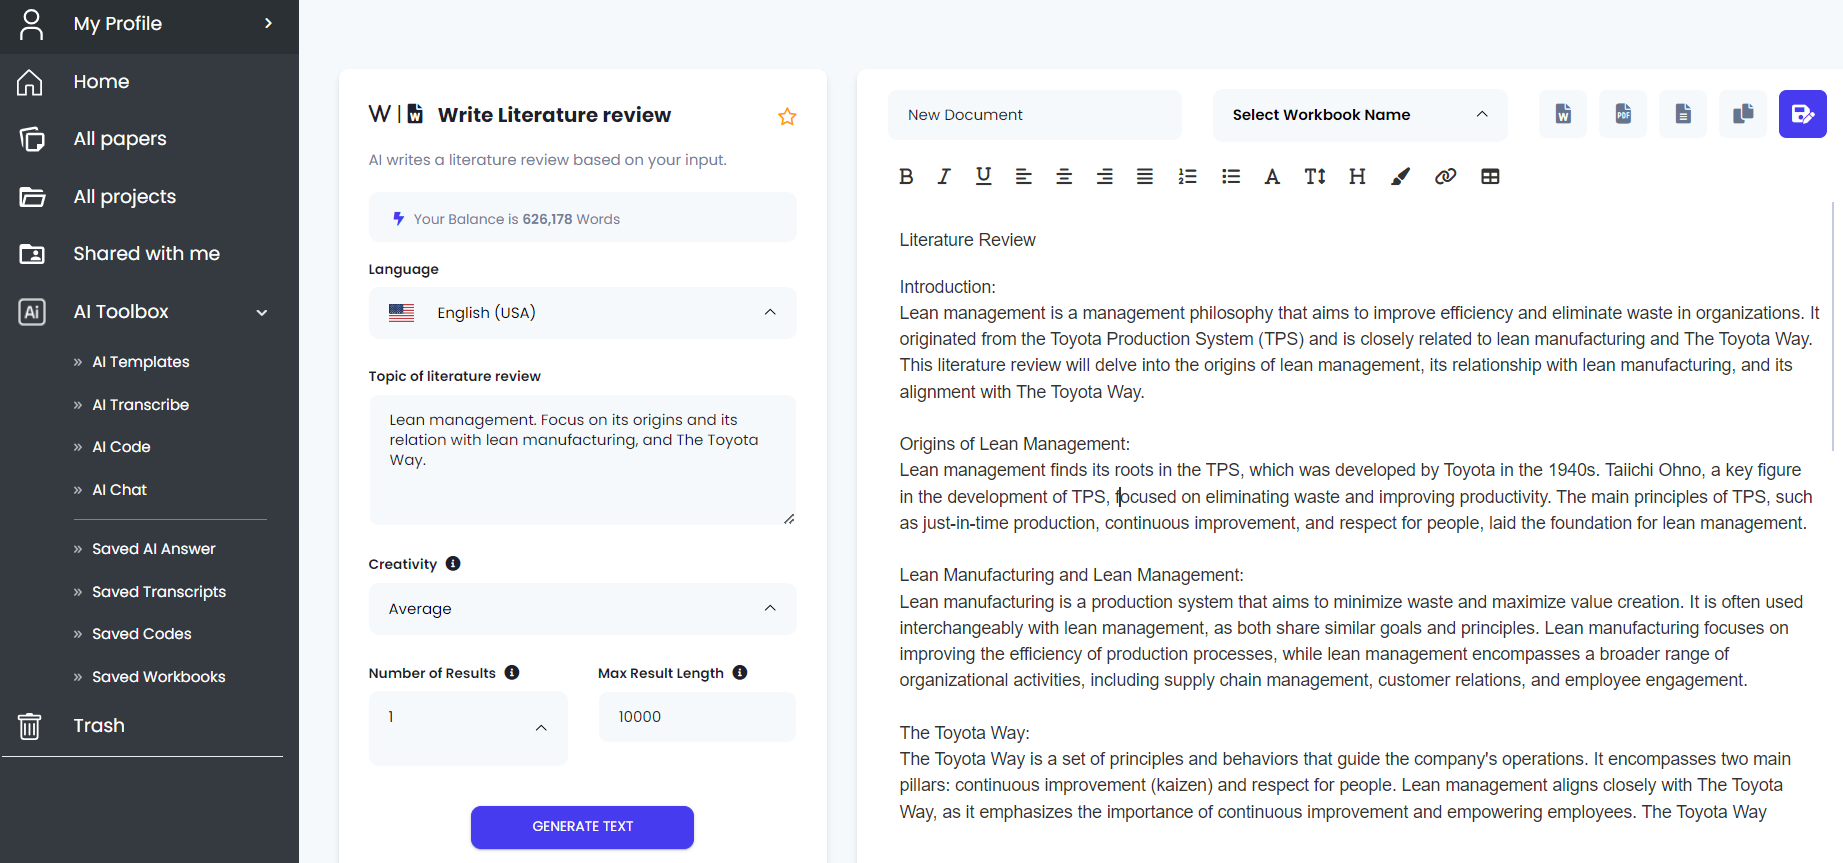
If you want the AI to continue. You can change the input, and then click the generate button again. It will continue to write from the bottom of the page. This will allow you to construct a whole literature review piece by piece.
We recommend that you modify the text to fit your paper, add text, redact text, and add proper references.
Other popular templates for writing are:
Rewrite this
This will allow you to completely rewrite any text you input. The AI will try to keep the meaning while completely rewriting whatever you put in.
Write anything
This is the default writing template. You can tell the AI to write anything. It will keep an academic tone by default.
You can test the different templates to see which you one helps you the most. For questions, please contact us.
This is how you analyze data or any text with AI.
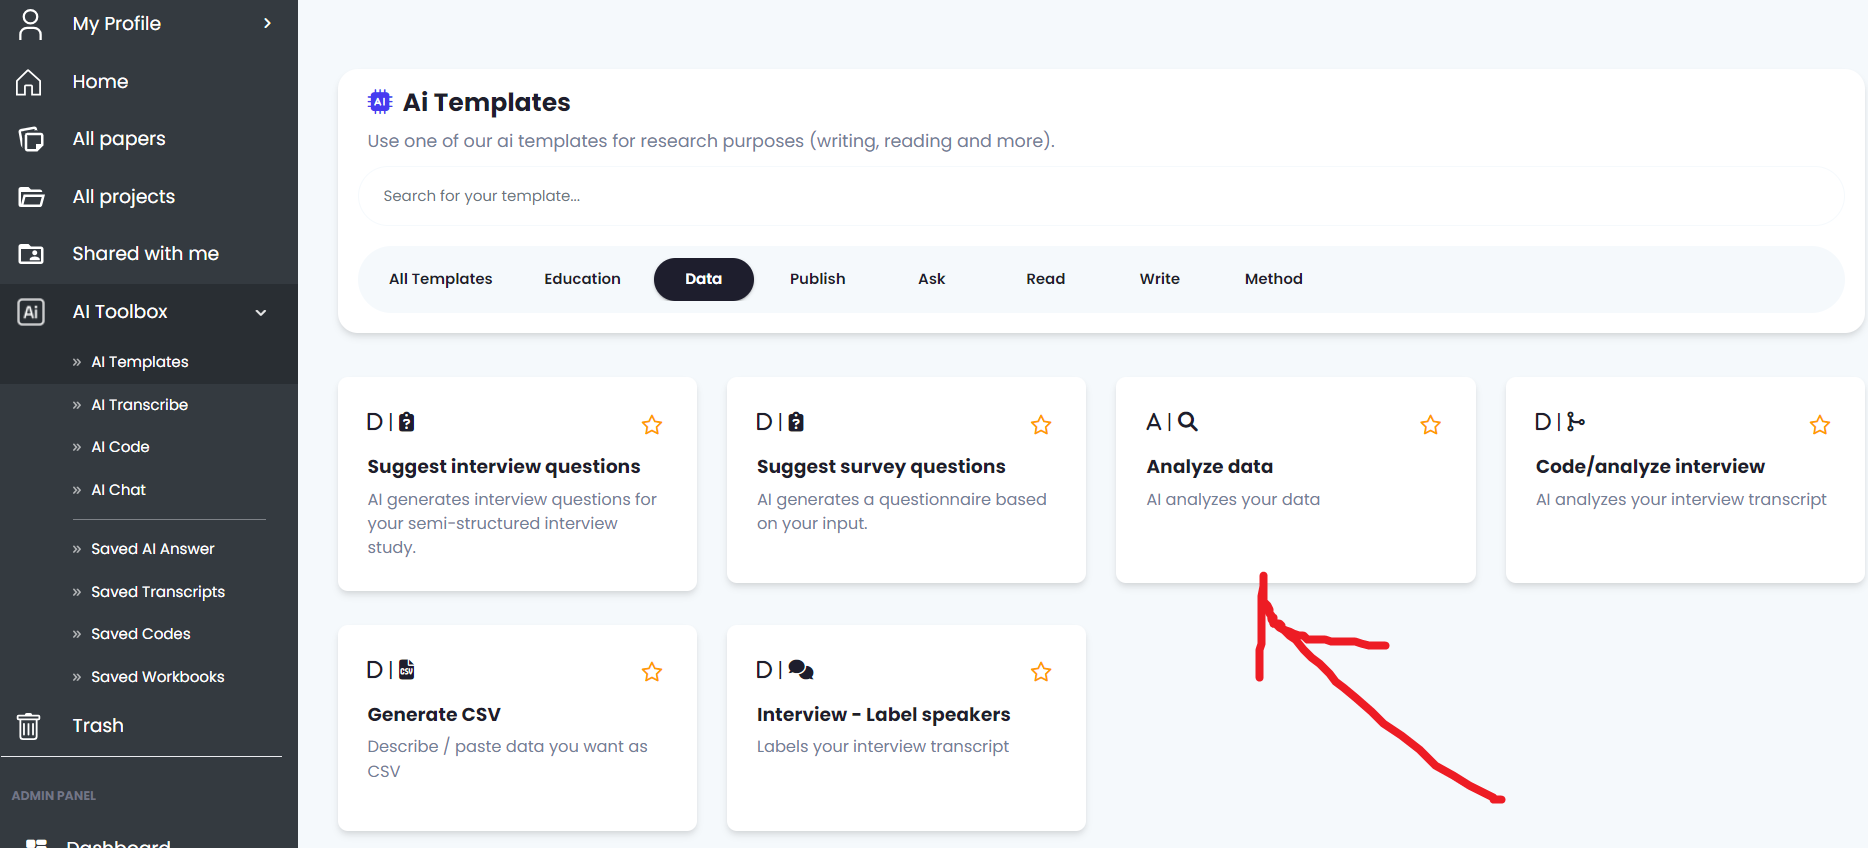
1) To begin, go the the AI template dashboard.
2) Click on the template named Analyze data.
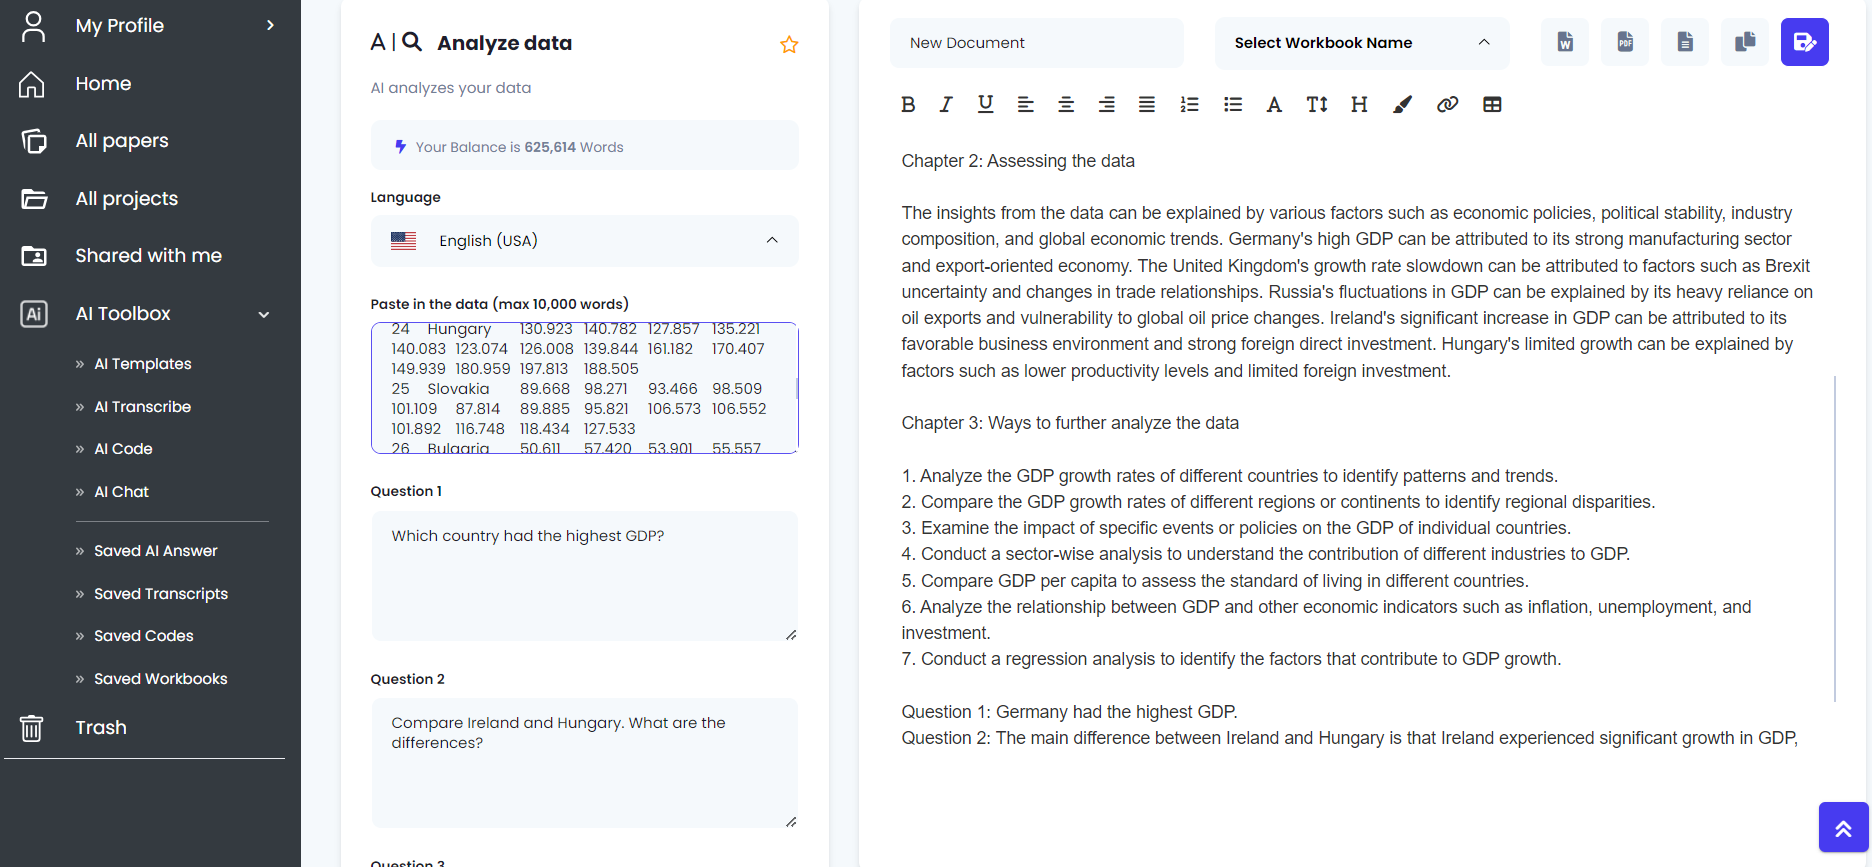
After you have clicked on the Analyze data template, you can then input your data on the left side. You can put in data as text or numbers. In this example, we have inputted a table that we copied for GDP values for different European countries.
This is how you transcribe your interviews in minutes. We also show you how to analyze your interviews.
1) Click on the AI Transcribe on the menu on the left side bar.
![]()
2) Upload your audio file. Click on section called Drag & Drop your audio file or Browse. You can click on it or drag your audio file to it.
![]()
When you have uploaded your audio file. Click on the Transcribe button. This will start the transcription process. You can leave all settings default, it usually works without specifying anything.
The transcription usually takes 1-2 minutes depending on how big your file is.
That is it! You now have a transcript that took only minutes to do.
Remember to name your transcript and save it. It will be saved under the page called “Saved transcripts” in the left sidebar.
We recommend you listen through it once to make sure all of the words are correctly transcribed.
4. Analyze your transcript
You can also use the AI to analyze your interviews. Click on AI templates in the left menu. After you have done that, find the template named “Code/Analyze interview”.
![]()
That is it! You have now both transcribed an entire interview and analyzed it in the span of less than 5 minutes.
All of the data that is transcribed is of course private and shown only to you.
To add a new paper, you can upload a PDF file either manually by clicking on the “Upload papers PDF” button in the left sidebar (recommended) or by searching for a paper on the research database.
The second option is a new beta feature which needs to be enabled in the settings. To enable it, you go to settings by clicking on your username in the top-left corner –> settings –> advanced settings.
Once this has been enabled, you can perform searches by typing in the search bar in the top left sidebar.
Tags are a powerful way to organize your papers and notes.
Create a tag
Click on a PDF paper that you have uploaded and inside the PDF view, click on the tag icon above PDF viewer on the right. From there, write your tags, click enter and then save before closing the window.
Filter using tags
Go back to the Dashboard view, your created tag will be shown in the right side. You can use the same tag for different papers. If you click on the tag, it will sort your papers based on that tag.
Delete tags
Go back to the Dashboard view, select the tag you wish to delete, and then click on the trash can that appears.
1. Export references from Zotero/Mendeley
Before you can import your references to Avidnote, you need to export your references from Mendeley/Zotero as a BibTeX file (see below for details).
2. Import to Avidnote
You can import your reference library by clicking on the import reference button. This button is shown inside the settings page. To go to the settings page, click on your username in the top-left corner, then on “settings” —> manage my data.
From there, click import references and select the BibTeX file that you exported earlier.
// Exporting from Zotero
To export your references from Zotero, go to Zotero and click on the menu item File and then click on Export and choose BibTeX as your file format. Only the reference information (not PDF) will be exported. You can then import this file into Avidnote by clicking on the import references button in Avidnote. You can add the PDFs manually by clicking upload PDF in Avidnote.
// Exporting from Mendeley
Use the ‘Export All’ option that you find in the file menu and select the BibTeX format. Only the reference information (not PDF) will be exported. You can add the PDFs manually by clicking upload PDF in Avidnote.
You can export your references in the settings page, under ‘manage my data’. These references can be imported into your reference management apps (e.g. Zotero/Mendeley).
Similarly you can export your notes under manage my data and download them as an Excell file.
To add/edit reference information to a specific paper, you can click on the small gear icon, and from there you can edit the citation info and click save.